
I’ve discovered that transforming your porch doesn’t require a complete overhaul; just a can of UV-resistant latex paint and the right Adirondack chair will do.
Whether you’re drawn to bold turquoise or understated Weatherwood, the color you choose becomes the foundation for your entire outdoor aesthetic.
The paint is only half the battle, though. The real work happens when you coordinate cushions, throws, and multiple chairs into a cohesive design that actually withstands the elements.
Paint Your Adirondack Chair in Classic Solid Colors

Why settle for plain wood when a fresh coat of paint can completely reinvent your porch’s personality? I’ve discovered that classic solid colors turn Adirondack chairs into statement pieces that belong in any outdoor space. Black delivers modern sophistication, while Weatherwood, my personal favorite, pairs with virtually any décor style, making it the contemporary neutral that never disappoints.
White offers that crisp, beachside elegance perfect for rooftops and sunny patios. Birch captures natural wood warmth, ideal for blending harmoniously with green landscapes. Grey provides versatile sophistication that harmonizes with multiple environments.
Each option invites you into a design community where your porch becomes an extension of your aesthetic vision. The beauty is that a single color choice transforms not just furniture, but how you experience your outdoor space and impress your neighbors.
Bold Adirondack Chair Colors That Make a Statement
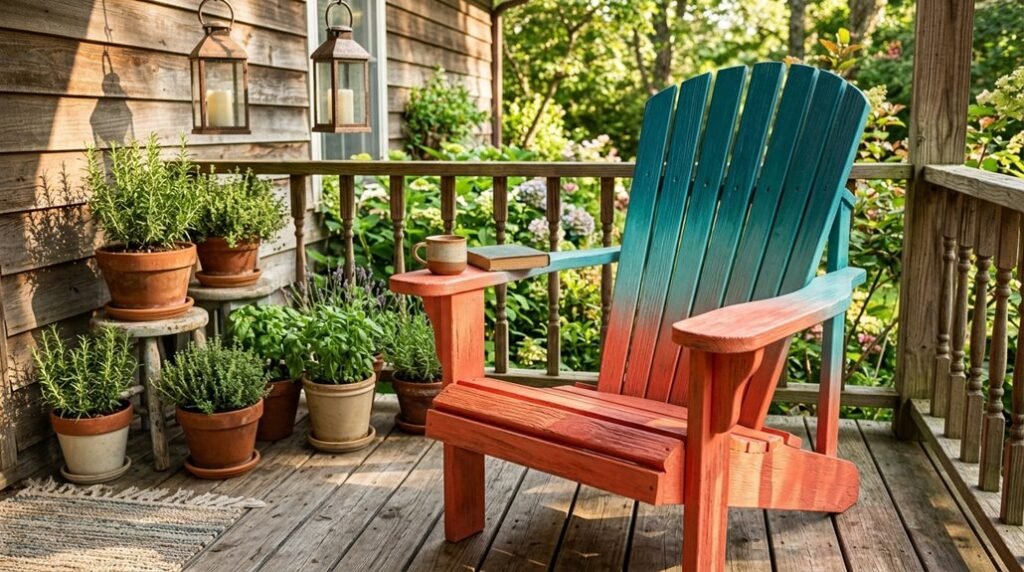
Ready to abandon the safety of neutrals? I’ve discovered that bold Adirondack chairs create distinctive outdoor spaces that showcase your personality. Bold red chairs inject fiery warmth; they’re statement pieces that command attention. Sunset-inspired orange options create that tropical vibe we’re all craving (goodbye, beige!), while bright yellow delivers cheerful sunlit energy that enhances your front entrance’s visual appeal.
Lime green offers a lively garden-friendly pop that pairs beautifully with green plants and flowers, creating cohesive outdoor spaces. Turquoise Adirondack chairs evoke cool coastal vibes, perfect if you’re dreaming of custom nautical themes. These aren’t just color choices; they’re belonging signals. When neighbors see your vibrant seating arrangement, they recognize kindred spirits who refuse ordinary porches. Your chair color becomes your outdoor identity.
Style Your Painted Chair With Cushions & Throws

Once you’ve settled on your chair’s paint color, you can layer cushions and throws to add interest and comfort. Navy-and-white striped cushions on a navy base create nautical vibes, or a textured throw in complementary tones invites you to sink in. Mixing patterns within the same color family (say, various shades of blue with different geometric prints) creates visual interest without looking too coordinated, while seasonal swaps keep your porch feeling fresh.
Lightweight linens in summer and cozy fleece in autumn let you refresh the space without requiring a complete redesign. Strategic textile layering does more than cushion your comfort; it’s your opportunity to play with mood and depth in ways that a painted chair alone simply can’t achieve.
Cushion Comfort & Color
The right cushions and throws can absolutely change your painted Adirondack chair from a solo statement piece into a welcoming retreat. I’ve found that weather-resistant outdoor fabrics with ultraviolet protection keep colors vibrant and water-repellent surfaces shed rain like a duck’s back. Pairing solid cushions with geometric throws adds visual intrigue without competing with your chair’s bold hue.
| Aesthetic | Cushion Colors |
|---|---|
| Coastal Vibes | Navy, teal, sand |
| Garden Retreat | Greens, olive, mustard |
| Nautical High-Contrast | Navy + white throws |
| Serene Escape | Soft blues, cream |
| Modern Cottage | Charcoal, taupe, sage |
Indexing ties and non-slip backing prevent cushions from migrating during breezy afternoons. Your invested comfort deserves proper anchoring.
Textile Layering Techniques
Anchoring your cushions is just the beginning; now comes the fun part where texture and pattern actually earn their keep. Textile layering elevates your painted chair from basic to custom-made, and I’ll show you how:
- Start with linen cushions as your foundation—they’re breathable and forgiving
- Layer coir or woven throws for tactile contrast (and that cozy factor)
- Mix complementary textures like soft linens against nubby fabrics for visual interest
- Rotate seasonally with lightweight blankets in spring or bold summer textiles
The best results come when you blend blues, teals, and whites without clashing. You’re not just decorating; you’re building a cohesive outdoor space that says “I belong here.” These textile combinations add softness and greenery to your space, creating depth that changes how your painted chair feels—both literally and visually.
Seasonal Accessory Swaps
Because your painted Adirondack chair’s personality doesn’t have to remain frozen in time, seasonal accessory swaps offer a bespoke way to keep it feeling fresh without repainting. I’ve discovered that rotating cushions transforms everything. Swap coastal blues and whites for summer, warm terracotta for fall, and rich burgundy for winter; your chair becomes a chameleon. Pair navy striped cushions with solid navy frames for timeless nautical cohesion that works across seasons and impresses neighbors.
Weather-resistant, machine-washable outdoor fabrics make updates effortless. Layer lighter-toned rugs beneath and matching throws overhead. This textural interplay grounds your design story. Don’t overlook festive details either.
I introduce palm-frond patterns in spring, plaid in autumn, and metallic gold tassels when holidays arrive. These seasonal accessory swaps celebrate transition without demanding commitment.
Coordinate Multiple Painted Adirondack Chairs for Maximum Impact

When you’re arranging multiple painted Adirondack chairs, consider thinking strategically about color coordination rather than just scattering them across your porch. You can anchor your design by selecting chairs within the same color family, such as soft sage, forest green, and seafoam, which creates a cohesive aesthetic without feeling chaotic.
Alternatively, you could embrace bold primary hues in a deliberate row for maximum visual impact, thinking more intentional design statement than accident. The key occurs when you alternate light and dark finishes, like pairing weatherwood with charcoal gray, which prevents your eye from getting fatigued while giving each individual chair attention.
Color Family Coordination Strategies
Multiple painted Adirondack chairs offer you a canvas for creating visual harmony, or delightful chaos, depending on your nerve. I’ve learned that color coordination transforms grouped seating from random to intentional.
Here’s my approach to cohesive arrangements:
- Stick within one color family (various blues or greens) rather than scattering unrelated hues across your porch
- Pair chairs with matching textiles: cushions and throws in complementary tones unify arrangements without visual overwhelm
- Use lighter shades strategically in sunlit zones (Birch, White, Weatherwood) to reflect light and prevent clutter
- Anchor bold primaries with neutral chairs (Gray or White) when mixing reds, blues, and yellows
This strategy lets you belong to a design community that values intention. Your grouped seating becomes a statement rather than an accident. That’s the bespoke porch aesthetic worth pursuing.
Creating Visual Porch Harmony
Coordinating your painted chairs isn’t just about picking pretty colors—it’s about orchestrating a visual conversation between each piece and your porch’s overall personality. I’ve found that anchoring multiple painted Adirondack chairs with a unified outdoor rug brings order to disorder. Layer coordinating cushions across chairs in complementary shades, whether you’re embracing monochromatic blues or playful reds and yellows.
The real work happens when arrangement meets intention: arrange chairs in deliberate patterns, such as semi-circles, rows, or staggered formations, that maximize social flow and sightlines. Against neutral backdrops like Weatherwood or White, your painted pieces become focal points without screaming for attention. Think of it as composing a symphony where each chair plays its own role, creating a harmonious outdoor space that welcomes everyone in.
Match Your Chair Color to Existing Décor, Climate & Personal Style

How do you pick a paint color that’ll actually make your porch look intentional instead of like you grabbed whatever was on sale?
I’ve found that achieving true color harmony requires balancing three key considerations:
- Match your existing palette — echo your deck’s weathered tones or cushion hues for cohesive visual flow
- Consider your climate — UV-resistant latex paints in sunny regions prevent that sad, faded look faster than you’d expect
- Reflect your personality — bold turquoise pops against neutral siding; warm yellows welcome guests like a friendly nod
Test before committing by painting small samples on your chair and observing how shadows and foliage shift the appearance throughout the day.
Color psychology matters too. Cool blues create calm, coastal vibes while warm oranges energize. The trick is letting your personal style guide the decision, not endless online scrolling.
Gather Your Supplies & Prepare the Chair
Before you even think about cracking open that paint can, you’ll want to gather your supplies and give your chair a proper once-over because painting over a wobbly disaster won’t fix structural problems. Start by inspecting for loose boards or screws, tightening anything that threatens instability.
Grab exterior spray paint with primer, a water-sealer top coat, drop cloth, masking tape, coarse sandpaper (80 grit for vintage pieces, 100 for newer ones), and household cleaner. Next, scrub your chair thoroughly with a damp cloth to banish dirt and dust, then let it dry completely. Sand all surfaces methodically; this roughens the finish and lets paint actually stick. Follow label instructions religiously; drying times aren’t suggestions, they’re survival guides.
You’re not just prepping a chair; you’re setting yourself up for success.
Master the Spray: Technique & Drying Time

Now that you’ve prepped your chair, I’ll walk you through the spray technique that’ll help you achieve a professional-looking finish. Hold the can about 10 inches away and use steady, sweeping motions; think of it like you’re conducting an orchestra, not swatting flies. Shake the can for a full minute beforehand to prevent those annoying pigment separations and drips that’ll ruin your verdure-colored masterpiece.
You’ll typically need two coats with touch-dry intervals between them, though three coats might be necessary for the solid coverage you’re after. Don’t forget to flip the chair to hit those nooks and crannies before letting the final coat cure for at least 24 hours.
Proper Spray Paint Technique
Once you’ve prepped your chair with sandpaper and primer, the real artistry begins, and yes, spray paint technique has more finesse than you’d think. Here’s how we master this craft together:
- Shake thoroughly for one minute to uniformize pigment and primer completely
- Hold the can 10 inches away, maintaining steady, sweeping motions across your chair
- Apply multiple coats (typically two to three) once the first dries to the touch
- Allow full curing: at least one day before handling or top-coating
The best results happen when you move fluidly, never pausing mid-spray, as that creates blotchy patches nobody wants. Think of yourself as a painter orchestrating color across wood.
Your bespoke Adirondack deserves this attention. Keep your rhythm consistent, your distance precise, and you’ll achieve that professional, saturated finish that elevates your porch into something special.
Optimal Drying Time Management
While your spray technique’s orchestration matters tremendously, the patience you exercise afterward determines whether that saturated finish holds its brilliance or becomes a sticky, dust-laden disappointment.
Between coats, I let each layer dry to the touch, typically thirty minutes to an hour depending on humidity. Two coats usually suffice, though a third coat rewards you with richer color depth.
The real work happens after spraying stops: I flip my chair to access those sneaky underside areas, ensuring no bare wood escapes notice. I resist the urge to touch or move my chair for a full day outdoors. Once completely cured, I apply an exterior water sealer as a bespoke topcoat. This final layer transforms my painted Adirondack into a weather-resistant sentinel, protecting that fresh verdure and keeping my porch looking intentional year-round.
Seal Your Paint to Last Longer

Your freshly painted Adirondack chair deserves protection, and that’s where a quality exterior water sealer steps in as your paint’s best friend. I’ve learned that this top coat is non-negotiable for outdoor longevity.
- Select a water-based sealant compatible with latex/acrylic paint to prevent yellowing and peeling
- Apply evenly using a brush, roller, or spray from top to bottom for complete coverage
- Allow full drying per product instructions (outdoor conditions take longer in humidity)
- Reapply every 1–3 years when wear shows
The color of your chair stays vibrant when properly sealed. I’ve discovered that this personalized maintenance routine keeps my chairs looking freshly painted season after season, making upkeep something I actually enjoy.
Repaint Every 1–3 Years & Protect Against Weather Damage
How often do you actually repaint those Adirondack chairs? I’d suggest every one to three years, depending on your climate’s personality. Harsh sun, salt air, and relentless rain accelerate weather damage faster than you’d expect. When I notice the paint looking chalky or the wood peeking through, I know it’s time.
I always reach for high-quality latex or acrylic exterior paint; it adheres better and resists moisture effectively. After the final coat, I top it with a clear waterproof sealer. That extra step is worth it.
Between repaints, I wash mine with mild soap and water quarterly. Grime buildup sneaks up and degrades everything. Chairs in shadier spots might stretch to four years, but coastal or sun-baked ones need attention sooner. Your chairs deserve this customized maintenance rhythm.
Next Steps: Build Your Dream Porch Setup
Transform your porch into a personalized retreat where guests actually want to gather and stay awhile.
Now that you’ve mastered the maintenance side of things, it’s time to orchestrate your chairs into a cohesive outdoor living space. I’m talking about creating a porch that actually invites people to stay awhile.
Here’s your game plan:
- Select coordinated Adirondack colors: weatherwood, white, and navy create instant sophistication without screaming “decorator showroom”
- Anchor with complementary textiles: pair your chairs with an outdoor rug and cushions that tie everything together
- Plan a multi-zone layout: position seating near your doorway for easy access, then cluster a conversation group around a coffee table
- Layer seasonal accents: throws and pillows refresh your space without heavy redecoration
This approach transforms your porch into a personalized retreat where guests want to gather. Your painted Adirondacks become the focal points of a thoughtful design rather than just furniture scattered about.